 By Colin Foster
Updated November 2026
A modern kitchen lighting ceiling plan works best when it layers general, task and accent light so every work zone is bright without glare. In this guide you will measure the room, choose fixture types and spacing, pick a color temperature and map out wiring locations before you buy anything. Most of the decisions come down to a few measurements and a simple layout sketch.
Step 1: Measure the Room and Mark Work Zones
Start with a floor plan drawn to scale on graph paper or in a free layout app. Mark the sink, range, prep counter, fridge and any island or table, then note the distance between each zone. These zones are where you need the most light, and they determine where ceiling fixtures should land.
Shopping for one? See our guide: Top 4 Kitchen Lighting Ceiling Lights for Every Layout.
Step 2: Choose a General Lighting Pattern
For most modern kitchens, a grid of recessed or surface-mounted downlights gives the most even ambient light. As a starting point, space recessed lights roughly 4 to 5 feet apart on center and keep them about 2 feet from walls so the wall surfaces are evenly washed. Larger rooms may need a second row. Check the spacing guidance from your fixture manufacturer, since beam angle and lumen output change the ideal distance.
Step 3: Add Task and Focal Lighting Over the Island
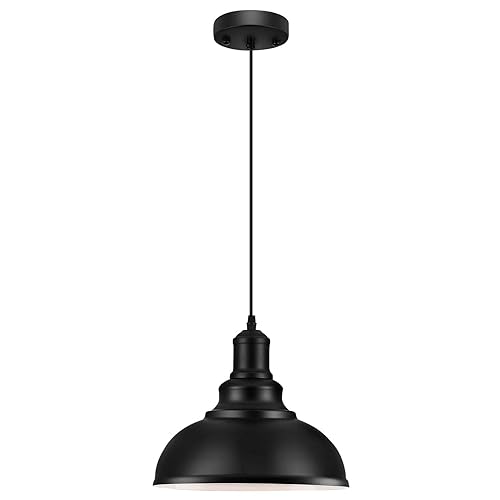
Pendants or linear fixtures over an island or peninsula handle task light and create a focal point. Hang them so the bottom sits about 30 to 36 inches above the countertop, and space multiple pendants evenly across the island length. If you are weighing styles, see Kitchen Lighting Fixtures Ceiling: 7 Steps to Plan the Right Layout for sizing and placement rules that carry over to most layouts.
Step 4: Pick Color Temperature and Brightness
Most modern kitchens look best at 3000K to 3500K, which reads as warm white without yellowing finishes. Use 4000K only if you want a crisp, cool look over a work-heavy space. Confirm that all fixtures share the same color temperature and a high color rendering index, because mixed temperatures are one of the most visible flaws in finished kitchens. For LED-specific guidance, read LED Lighting Kitchen Ceiling: 7 Steps to Even, Glare-Free Light.
Step 5: Plan Switching, Dimming and Wiring
Put general, island and accent lights on separate switches or zones so you can use only what you need. Dimmers on general lighting let you soften the room for evening use. Mark ceiling joists and outlet boxes before you cut, and have an electrician confirm circuit capacity and wiring method, since local electrical codes vary and this work is safety-critical.
Step 6: Coordinate Fixtures With Ceiling Features
Flush and semi-flush fixtures suit low ceilings, while stems or pendants suit ceilings over 9 feet. If you plan a ceiling fan with a light kit, make sure the fan sits centered in the room and that the light output matches the rest of the kitchen. More detail is in Kitchen Ceiling Fans with Lighting: 7 Factors to Get It Right.
Step 7: Mock Up the Layout Before Installing
Before you cut any holes, tape the fixture footprints on the ceiling with painter’s tape and check sightlines, clearances and glare from the sink and cooktop. Adjust positions until the light lands where you work, not on your head or in your eyes.
Layout Checklist
- Scaled floor plan with work zones marked
- Recessed light grid spacing and wall offsets set
- Island or table pendant count and height noted
- Color temperature chosen and matched across fixtures
- Separate switching and dimmer zones planned
- Joist and box locations checked with an electrician
- Painter’s tape mockup reviewed at eye level
Common Mistakes
- Placing all lights in the room center, which leaves counters shadowed.
- Mixing color temperatures from different manufacturers.
- Hanging island pendants too high, which causes glare across the seating.
- Skipping the mockup and discovering a clearance problem after drywall is up.
- Ignoring dimming compatibility between LED drivers and dimmer switches.
Recommended Gear
- Painter’s tape, which lets you mock up fixture positions on the ceiling without marking the paint. View on Amazon
- A laser level, which keeps pendant and recessed layouts aligned across the room. View on Amazon
- A non-contact voltage tester, which helps confirm circuits are dead before any work. View on Amazon
FAQ
How far apart should recessed lights be in a modern kitchen?
A common starting point is 4 to 5 feet on center with fixtures about 2 feet from walls. Confirm the exact spacing against your fixture’s beam angle and lumen output.
What color temperature works best for modern kitchen ceiling lights?
Most homeowners choose 3000K to 3500K for a warm-white look that suits modern finishes. Use 4000K only if you prefer a cooler, task-focused feel.
Can I install the kitchen lighting myself?
Mounting fixtures can be a DIY project for some homeowners, but new circuits and wiring changes should be handled by a licensed electrician. Consult a professional for any electrical work to stay safe and code-compliant.
Conclusion
A well-planned modern kitchen lighting ceiling layout combines even general light, focused task light over counters and an island, and warm-white color that stays consistent across the room. Measure first, mock up the layout and confirm wiring with a professional before you install. The result is a kitchen that looks sharp and works well at every hour.
Related reading
- Top 4 Best Lighting for Kitchen Ceiling Picks Compared for 2026
- Replace Fluorescent Lighting in Kitchen: 7 Steps to a Modern Upgrade
- Mid Century Modern Lighting Kitchen: 7 Fixture Choices and Layout Rules
Ready to choose one?
About Colin Foster
Colin Foster is part of our editorial team and reviews and edits our kitchen design & remodeling guides, checking product details against manufacturer specifications and owner feedback.