By Lauren Holland
Updated November 2026
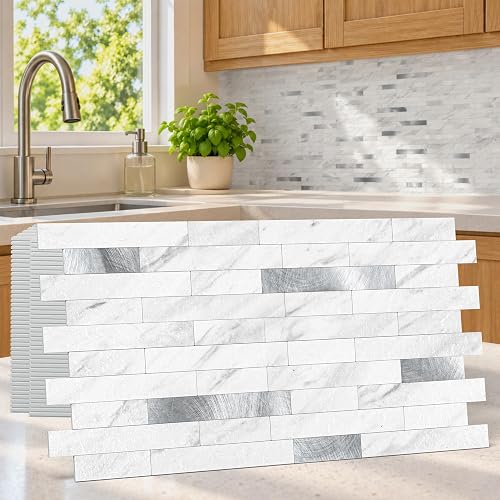
Kitchen backsplash wall panels are rigid or semi-rigid sheets that cover the wall between your countertop and upper cabinets, usually in one or two pieces instead of hundreds of individual tiles. This guide walks you through measuring the wall, comparing panel materials, planning the layout and installing them so the finished surface looks clean and holds up to cooking splatter. By the end, you will know how to estimate what you need and how to avoid the errors that make panels look like panels.
What Kitchen Backsplash Wall Panels Are and Where They Work Best
Wall panels differ from tile in that each piece is a large sheet, often 2 to 4 feet wide and 4 to 8 feet long, made from metal, acrylic, glass, PVC, engineered stone or laminate. Because there are few seams, they suit tight budgets for labor and time, and they go up faster than a traditional tile job. For a broader comparison of finished looks, see 3 Best Backsplash Panels for Kitchen Walls in 2026.
Panels work well on flat, relatively straight walls, on rentals or rooms you want to update quickly, and on surfaces where grout lines would collect grease. They are less forgiving on badly out-of-plumb walls, where tile can be set to follow an irregular surface and panels will show gaps.
Step 1: Measure the Wall Accurately
Good measurements prevent most of the problems people report with panels. Record the following for each wall section:
- Width at the top, middle and bottom of the backsplash zone, since walls are rarely perfectly square.
- Height from the countertop to the underside of the upper cabinets, or to the ceiling if there are no uppers.
- The location and size of outlets, switches, range hood, windows and any plumbing or gas lines.
- Whether the wall is plumb and flat. Lay a 4-foot level vertically and horizontally and note any bows larger than about 1/8 inch.
Measure every dimension twice, and write them on a sketch of the wall. If you are planning a backsplash around a window, the logic in Tile Backsplash Around Kitchen Window: A Step-by-Step Guide applies to trim and edge decisions as well.
Calculating how many panels you need
Add up the total square footage of the wall area (width times height for each section), subtract large openings like a window, then add 10 to 15 percent for cuts, mistakes and future repairs. Check the sheet size listed by the manufacturer and divide the net area by the area of one sheet, rounding up. If a panel must be cut around an outlet, plan the cut location before ordering so you can avoid a sheet that is almost all waste. For another angle, check out 6 Best Coffee Mug Wall Mounts for Kitchens and Coffee Bars (2026).
Step 2: Choose the Right Panel Material
Each material behaves differently in heat, moisture and cleaning. Compare them against how you cook and how much wear the wall will see.
| Material | Strengths | Limitations |
|---|---|---|
| Stainless or aluminum metal | Heat and grease resistant, wipes clean, suits modern kitchens | Shows fingerprints and scratches, can dent, may sound hollow |
| Tempered glass | Smooth, non-porous, easy to clean, accepts color well | Heavy, needs professional-grade mounting, can chip at edges |
| PVC or acrylic panels | Lightweight, water resistant, many patterns including faux tile | Can warp or discolor near high heat, must stay clear of the cooktop |
| Engineered stone or compact laminate | Durable surface, matches countertops, low maintenance | Heavier, may require cutting tools and more skill |
| Decorative tin or embossed metal | Strong vintage or rustic character | Requires a flat substrate, seams and corners need careful detailing |
Manufacturers specify minimum distances from burners and heat sources for many plastic-based panels, so check those numbers before you pick a material for behind a range. Some plastic and laminate options also have specific limits on direct sunlight.
Step 3: Plan the Layout and Panel Orientation
Layout decides whether the backsplash looks intentional. Work through these decisions before you cut anything.
- Choose a starting point. Most installers begin at the wall corner closest to the main sink or range, so cut pieces fall at less visible edges.
- Decide the panel direction. Vertical grain or pattern lines make a short wall look taller; horizontal patterns widen a narrow space.
- Center the layout on the range or sink when the wall allows. A full panel behind the range looks deliberate, and a sliver of panel at the end does not.
- Dry fit the panels on the floor or against the wall, with spacers, and check that seams line up with cabinet edges and outlets.
- Mark the outlet and switch positions on the panel before cutting. Cut openings about 1/8 inch oversize so the cover plate covers the gap.
For more on how the surface sits against cabinets and appliances, the wall planning in Backsplash on Kitchen Wall: A Step-by-Step Guide for Beginners offers useful reference points.
Step 4: Prepare the Wall
Preparation matters more than the panel itself. Panels cannot hide a bulged wall or dust that prevents adhesive from bonding.
- Remove outlet covers, switch plates and any hardware on the wall.
- Clean the wall with a degreaser, since cooking residue on drywall is common and blocks adhesion.
- Fill dents and fix loose drywall or paint that peels when you press tape against it.
- Let the wall dry completely after cleaning and before applying adhesive.
- Confirm the wall is flat within the tolerance your panel manufacturer specifies, and shim low spots if needed.
Step 5: Install the Panels
Choosing the adhesive and fasteners
Most wall panel makers specify a construction adhesive or a panel adhesive, and some require mechanical fasteners as well. Use only the adhesive the manufacturer names for your material, because the wrong product can cause staining or failure. Read the open time and cure time on the label, and follow the instructions for ventilation. If you are unsure whether an adhesive is suitable for a specific panel or wall, consult a professional installer or the panel manufacturer before proceeding.
Setting the first panel
- Apply adhesive in the pattern the manufacturer specifies, usually beads or a grid, keeping it away from the outer 1 inch edge if the manufacturer says so.
- Press the panel into place, starting at the reference corner and checking level as you go.
- Hold or brace the panel for the initial set time, which can be minutes to hours depending on the product.
- Check that the panel is plumb with a level before the adhesive sets.
Finishing the seams and edges
Use trim, caulk or a matching channel at the countertop and cabinet junctions. Silicone caulk sized for kitchen use prevents water from getting behind panels at the counter edge. Fill small gaps at the corners with the manufacturer-approved sealant, and clean away any excess adhesive before it cures.
Tips and Common Mistakes
- Skipping the level check. A panel that is off by a few degrees becomes obvious beside a straight cabinet line.
- Ignoring heat zones. Plastic panels placed too close to the cooktop can warp, so confirm clearance before installation.
- Cutting before dry fitting. Measuring once and cutting once is risky when outlets and corners are involved.
- Using the wrong adhesive. A general-purpose adhesive may not bond to the panel face or may stain it.
- Leaving outlets flush with the panel. Cover plates should sit flat on the panel, with the box extended if needed.
- Forgetting maintenance access. If a panel is glued in place, plan how you would replace a damaged section later.
Also compare panel options against other finishes before committing. The guide to 5 Best Backsplash Tiles for Kitchen Walls in 2026 helps when you want to weigh panels against tile.
Recommended gear
A few tools make a visible difference to panel work, especially for accurate cuts and level placement.
- DeWalt DWE7491RS 10-inch Compound Miter Saw helps with straight, square cuts on trim and panel edges, which keeps corners tight. View on Amazon
- Stanley FatMax 78-180 Torpedo Level gives an accurate reference for checking plumb and level during set-up. View on Amazon
- Sakrete Construction Adhesive is a type of product often used in wall panel work, though you should confirm the exact product named by your panel maker. View on Amazon
FAQ
Are kitchen backsplash wall panels easier to install than tile?
Usually yes, because large sheets cover more area quickly and there is no grout. Preparation and alignment still matter, so the job is not effortless.
Can I install panels over existing tile?
It depends on the panel and the condition of the tile. Some installers add a flat substrate first, while others glue directly if the surface is clean, level and sound. Check the manufacturer guidance for your material.
Which panels are best behind a range?
Metal, tempered glass and engineered stone generally handle heat better than many plastic options. Always confirm the clearance the manufacturer specifies.
How do I clean wall panels?
Use a soft cloth with mild dish soap and water for most surfaces, then dry. Avoid abrasive pads and harsh chemicals unless the manufacturer approves them for your specific finish.
Do panels cover outlets?
They should not. Cut openings for outlets and switches, then fit cover plates over the panel edge with the box extended if necessary.
Can I replace one damaged panel?
Often yes, if you planned for access. Carefully cut out the damaged sheet, scrape the adhesive off the wall, and install a matching replacement. Matching finishes across production runs can be difficult, so keep spare material when you buy.
Should I hire a professional?
If the wall is badly uneven, the panels are heavy glass or stone, or electrical boxes need relocating, consult a professional installer. Electrical work should be done by a licensed electrician.
Conclusion
Kitchen backsplash wall panels can give you a clean, durable surface with fewer seams and a faster installation than tile. Success depends on careful measuring, choosing a material suited to your cooking, planning the layout around outlets and corners, and preparing the wall thoroughly. Take the time to dry fit and check level before the adhesive sets, and the finished backsplash will look like a planned feature rather than a shortcut.
Related reading
Ready to choose one?
About Lauren Holland
Lauren Holland is part of our editorial team and reviews and edits our kitchen design & remodeling guides, checking product details against manufacturer specifications and owner feedback.