 By Colin Foster
Updated November 2026
Fluorescent kitchen lighting fixtures remain common in older homes and rental kitchens, and they can still do a respectable job when they’re sized and placed correctly. This guide explains how to judge what you already have, choose the right tube or lamp type, and decide whether to keep the fixture or replace it with LED. By the end, you’ll know how to get even, glare-free light over your counters and sink.
Step 1: Identify the fixture type and tube size
Most kitchen fluorescents use either a T8 or T12 linear tube, or a compact circline or troffer-style fixture. T8 tubes are 1 inch in diameter and T12 tubes are 1.5 inches, so the diameter tells you which ballast and socket you need. Check the length printed on the tube, usually 2 feet, 4 feet or 8 feet. Turn the power off at the breaker before you open any housing.
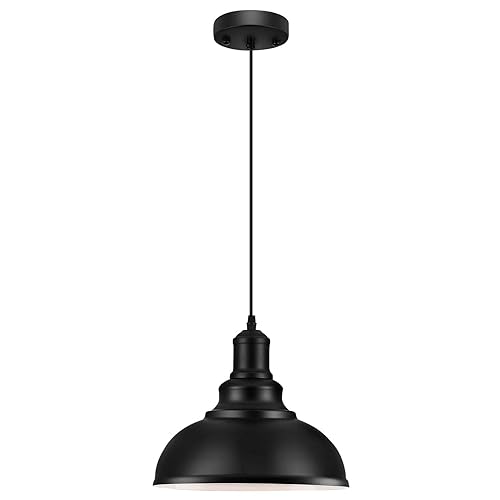
Shopping for one? See our guide: 7 Best Pendant Lights for Kitchen Island (2026): Expert Picks.
Step 2: Check color temperature and color rendering
Color temperature is measured in Kelvin. Values near 3000K give a warm, yellowish cast, 4000K reads as neutral white, and 5000K and above look cool and bluish. For a kitchen, 3500K to 4000K is a workable range because it keeps food looking natural without feeling clinical. Also look for a color rendering index (CRI) of 80 or higher on the packaging, since low-CRI tubes make wood, meat and produce look dull.
Step 3: Plan the layout around work zones
A single ceiling fixture centered in the room often leaves shadows on the counter where you actually stand. Position linear fixtures so their light falls across the work zones, not directly into your eyes. Long fixtures run parallel to the counter work area work better than short ones placed randomly. Pair ceiling light with task lighting over the sink and range, and consult the related guide Kitchen Task Lighting: Lighting Every Work Surface for spacing ideas.
Step 4: Decide whether to keep, retrofit or replace
You have three realistic options. You can keep the existing fixture and only swap tubes, which is the simplest move. You can retrofit with LED tubes that bypass the old ballast, which many manufacturers describe as more energy efficient and longer lasting. Or you can replace the whole fixture with a modern LED unit. Check whether the fixture uses magnetic or electronic ballasts before buying LED replacements, because the wrong type can flicker or fail. If you are unsure about wiring, consult a licensed electrician before making changes.
Quick reference
| Option | Best for | Main tradeoff |
|---|---|---|
| Keep fluorescent tubes | Budget refresh, short-term use | Slower startup, dimmer as tubes age |
| LED retrofit tubes | Existing fixture, better output | Ballast compatibility must be confirmed |
| Full LED fixture | Long-term remodel | Requires wiring work |
Step 5: Add layers beyond the ceiling
Fluorescent ceiling fixtures give general light, but they rarely provide enough light on the counter edge. Under-cabinet strips solve that problem. For guidance on mounting them, see Lighting Underneath Kitchen Cabinets: 7 Steps to Even, Glare-Free Light. Keeping the ceiling layer dimmer than the task layer also reduces glare on the countertop.
Step 6: Verify and maintain the installation
After installing, switch on each fixture and walk the room. Note any flicker, buzzing or dark patches. Replace tubes in pairs when they start to dim, because a new tube beside an old one produces uneven color and brightness. Clean diffusers annually, since dust and grease can cut output noticeably.
Checklist before you buy
- Measure the fixture length and tube diameter (T8 or T12).
- Confirm the ballast type if you plan to use LED tubes.
- Choose 3500K to 4000K with a CRI of 80 or higher.
- Map work zones: sink, range, prep counter and island.
- Plan a separate task layer for under-cabinet areas.
Common mistakes
- Mixing old and new tubes, which causes uneven color.
- Choosing 5000K or higher, which makes the kitchen feel cold.
- Installing LED tubes into a magnetic ballast without checking compatibility.
- Relying on one central fixture and leaving counters in shadow.
- Skipping cleaning, which quietly reduces brightness.
Recommended gear
- Multimeter: helps you confirm whether a fixture is live and which wires carry power before you work on it. View on Amazon
- LED replacement tubes: compatible options can upgrade an existing fixture without a full rewire, provided the ballast type matches. View on Amazon
- Non-contact voltage tester: a quick way to check that a circuit is dead before you touch connections. View on Amazon
FAQ
Can I replace fluorescent tubes with LED tubes?
Often yes, but only if the fixture is compatible. Check whether it has a magnetic or electronic ballast, and choose LED tubes that match. If the ballast is unclear, ask a licensed electrician.
What color temperature works best for a kitchen?
Most homeowners find 3500K to 4000K comfortable for food prep. It looks natural on produce and surfaces without feeling yellow or harsh.
Why does my fluorescent light flicker?
Flicker is usually caused by an aging tube, a failing ballast or a loose connection. Replace the tube first, and if the problem continues, have a qualified electrician inspect the ballast and wiring.
Conclusion
Fluorescent kitchen lighting fixtures can work well when you match the tube type, color temperature and layout to how the kitchen is used. Start by identifying what you have, then decide whether to keep, retrofit or replace. Add task lighting where you work, and your kitchen will feel brighter without relying on a single overhead source.
Related reading
- Replace Fluorescent Lighting in Kitchen: 7 Steps to a Modern Upgrade
- Kitchen Table Lighting Fixtures: 6 Steps to Size and Hang Them Right
- Kitchen Lighting Fixtures Ceiling: 7 Steps to Plan the Right Layout
- Best Under-Cabinet Lighting for Kitchens: 6 Fixtures Compared
- Lighting Underneath Kitchen Cabinets: 7 Steps to Even, Glare-Free Light
- Kitchen Task Lighting: Lighting Every Work Surface
Ready to choose one?
About Colin Foster
Colin Foster is part of our editorial team and reviews and edits our kitchen design & remodeling guides, checking product details against manufacturer specifications and owner feedback.